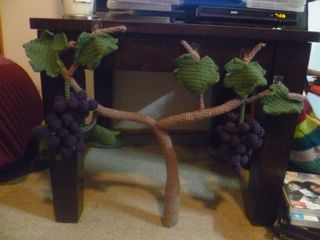
People said I couldn’t have a grapevine because I live in a tiny apartment. WELL I SHOWED THEM!!! This pattern uses 12 ply brown and purple wool, 8 ply green wool, a 4 mm hook, a 3.5 mm hook and a 2.5 mm hook.

I made my vine quite small (my table is small and I need to move on to my dad’s fathers’ day present) but you can make it as large as you like. Just keep making bunches of grapes, make longer branches, make more of them or different lengths etc.

Bunches of grapes
Grapes (keep making them until you run out of purple wool and think, ‘oh well, that’s enough grapes’)
With purple 12 ply wool and a 4 mm hook
Round 1: 6sc in a magic ring (6 stitches)
Round 2: increase in every stitch (12 stitches)
Round 3: sc in each stitch (12 stitches)
stuff
Round 4: decrease until the hole closes.
Fasten off, leave a tail for sewing.
Stems of the bunches of grapes (make 2 – or you could do more if you had more purple wool for grapes than I did)
With green 8 ply wool and a 3.5 mm hook
Main stem
Round 1: 4 sc in a magic ring (4 stitches)
Rounds 2 – 31: sc in each stitch (4 stitches)
Fasten off leaving a long tail for sewing.
Medium stem (make 2 for each bunch of grapes)
Round 1: 4 sc in a magic ring (4 stitches)
Rounds 2 – 8: sc in each stitch (4 stitches)
Fasten off leaving a long tail for sewing.
Assembly
Sew the medium stems to the main stem and sew on the grapes. This will take ages, trust me.
Vine
Main stem
With brown 12 ply wool and a 4 mm hook
Stuff as you go
Round 1: 6sc in a magic ring (6 stitches)
Round 2: increase in every stitch (12 stitches)
Round 3: sc in the first stitch, increase in the next stitch – repeat (18 stitches)
Round 4: sc in each stitch (backloops only) (18 stitches)
Rounds 5 – 25: sc in each stitch (18 stitches)
Round 26: sc in the first stitch, decrease the next two stitches together – repeat (12 stitches)
Rounds 27 – 56: sc in each stitch (12 stitches)
Round 57: sc in the first stitch, decrease the next two stitches together – repeat (8 stitches) mark this round by tieing in a piece of colourful wool
Rounds 58 – 97: sc in each stitch (8 stitches)
Round 98: sc in the first stitch, decrease the next two stitches together, sc in the first stitch, decrease the next two stitches together, sc in the last two stitches (6 stitches)
Rounds 99 – 113: sc in each stitch (6 stitches)
Round 114: sc in the first stitch, decrease the next two stitches together – repeat (4 stitches)
Rounds 115 – 124: sc in each stitch (4 stitches)
Fasten off, sew the hole closed.
Second branch
Round 1: chain 8, slip stitch in the first chain to form a ring (8 stitches)
Rounds 2 – 40: sc in each stitch (8 stitches)
Round 41: sc in the first stitch, decrease the next two stitches together, sc in the first stitch, decrease the next two stitches together, sc in the last two stitches (6 stitches)
Rounds 42 – 56: sc in each stitch (6 stitches)
Round 57: sc in the first stitch, decrease the next two stitches together – repeat (4 stitches)
Rounds 58 – 67: sc in each stitch (4 stitches)
Fasten off, sew the hole closed.
Tiny stems (make four)
Round 1: 4 sc in a magic ring (4 stitches)
Rounds 2 – 31: sc in each stitch (4 stitches)
Fasten off, leaving a long tail for sewing.
Assembly
Sew the second branch to the main stem. Sew the tiny stems to the second branch and the main stem.
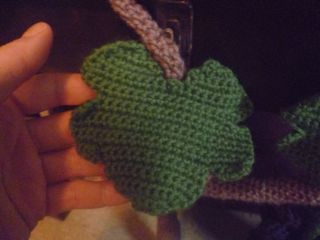
Leaves
The pattern is here. Use green 8 ply wool and a 2.5 mm hook. I made 7 leaves before I got bored. You may do better.

There is a bigger picture on Ravelry.
Don’t mind the faint arrow pencil marks. I use those to remind myself which way each row is going.
Sew the leaves onto the vine.
Assembly
I used clear adhesive hooks that are normally used for hanging pictures to attach the vine to the table. I attached the base of the main stem to my carpet using a safety pin.
Happy gardening 🙂